Interface tour
VeraTracer Desktop puts the editor, the checkpoint history and the results of a run in one window. This page walks through each region, what it controls, and the shortcuts worth learning first.
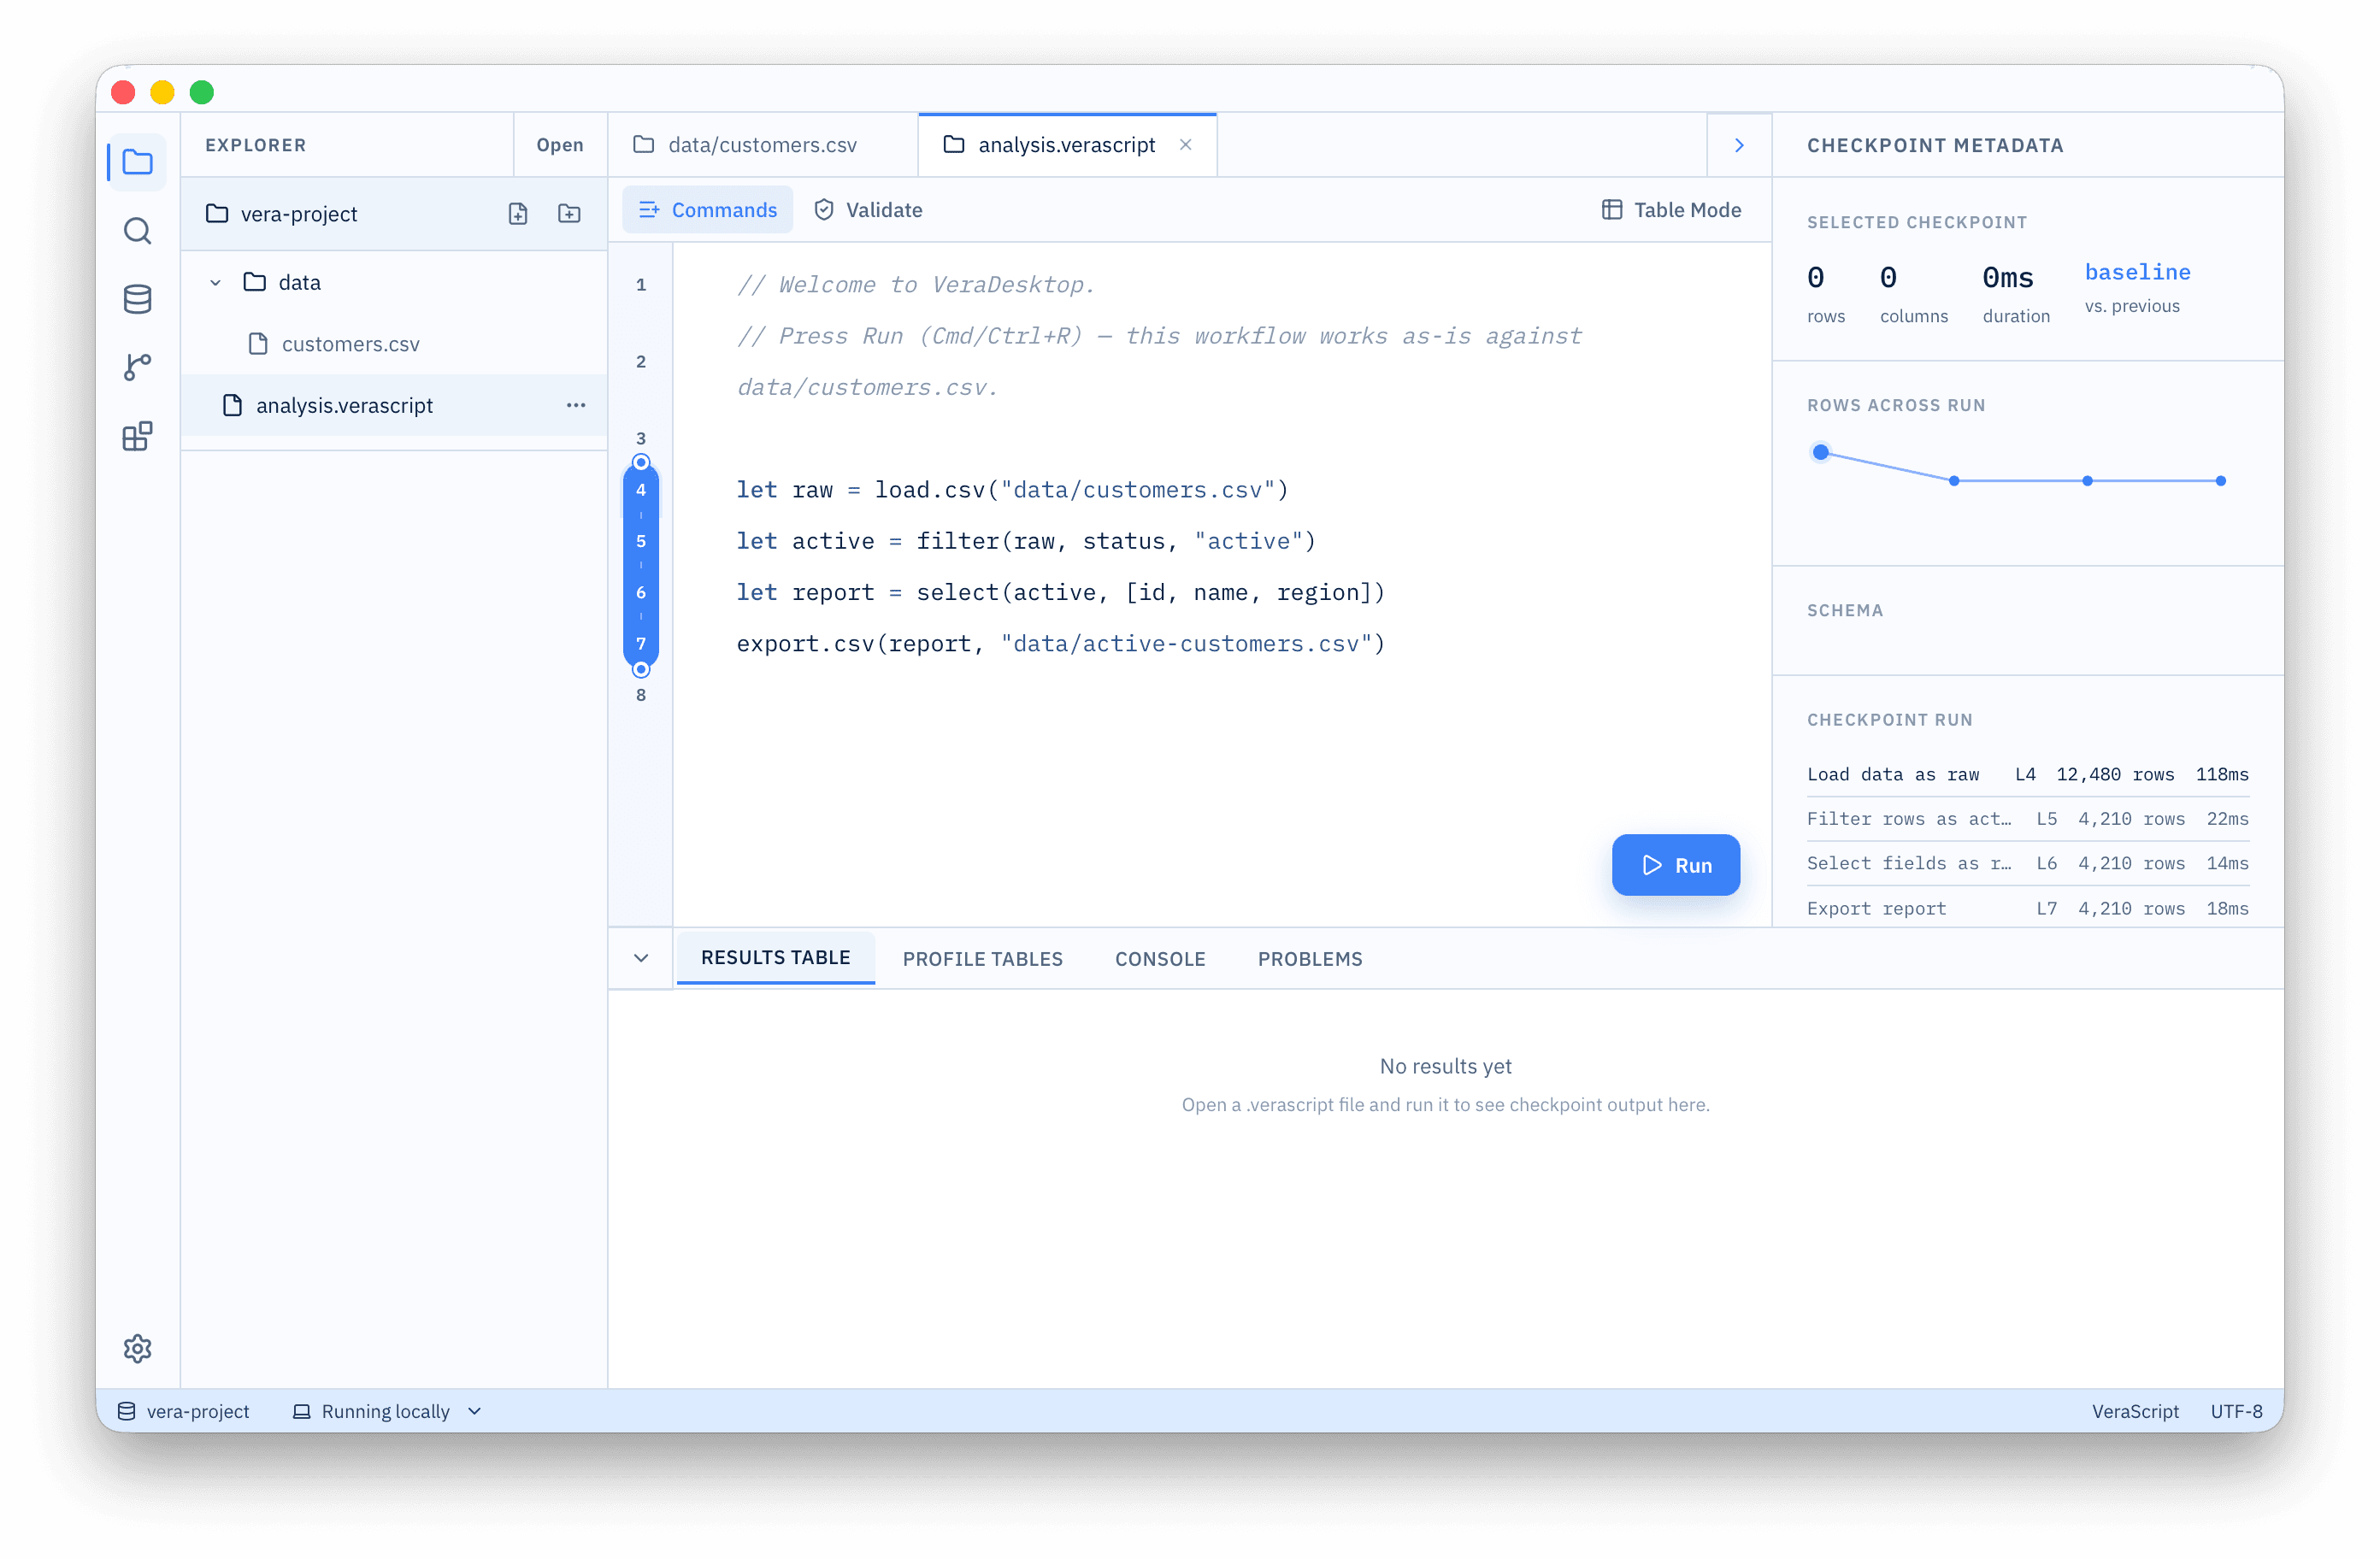
The regions
Activity bar
Far leftFive views: Explorer, Search, Connections, Checkpoint History and Modules, with Settings pinned at the bottom. Clicking an icon swaps what the sidebar shows; it does not change the editor.
Sidebar
Left of the editorWhatever the activity bar selected. In Explorer this is your project tree, with buttons for new file and new folder, and a context menu for rename, duplicate, move and delete.
Editor tabs
Across the topOne tab per open file. A dot instead of a close button means unsaved changes — closing that tab will ask before discarding them.
Editor and checkpoint gutter
CentreYour VeraScript, with the checkpoint range drawn as a blue track down the gutter beside the line numbers. This is the part you will interact with most.
Checkpoint metadata
RightThe inspector for whichever checkpoint is selected — row and column counts, duration, the change against the previous checkpoint, the schema, and a per-step breakdown of the run.
Bottom panel
Below the editorResults table, Profile tables, Console and Problems. Collapse it with the chevron when you want the editor full height.
Status bar
Very bottomProject name, where the run will execute (locally or on a server), the language and the file encoding.
Starting a session
The app opens on a welcome screen rather than a preloaded workspace. Choose New to create an empty project, Open to point at a folder on disk, Sample for the bundled example, or pick something from Recents. Whatever you had open last is restored on the next launch, unless you explicitly closed it.
Working in the editor
The toolbar
Three controls sit above the editor:
- Commands — the command builder. Inserts a ready-made template for any supported statement so you do not have to remember argument order.
- Validate — parses the script and reports problems without executing it. Useful before a run that reads a large source.
- Table Mode — promotes the results table to the main workspace and moves the code into a smaller panel below. Worth switching to when you are reading output rather than writing steps.
The checkpoint gutter
The blue track beside the line numbers is the range that will run. It has a handle at each end, and it stays in sync with the Checkpoint History pane — moving one moves the other. Each file remembers its own range.
- Drag a handle to grow or shrink the range from either end.
- Single click a checkpoint to move the nearest handle to it.
- Double click a checkpoint to collapse the range down to that one step.
Steps outside the range keep their computed state instead of running again — see Checkpoints for what that means in practice.
Running
Press ⌘R or use the Run button in the corner of the editor. While a run is in progress the button becomes Stop, and ⌘. cancels. Result panels stay empty until a real run finishes, so anything you see in them came from your data.
Reading the inspector
Selecting a checkpoint updates the right-hand panel. The most useful habit is watching the comparison against the previous checkpoint — a filter that removed far more rows than you expected shows up there before it shows up in your results.
Underneath, Rows across run plots the row count at each step, Schema lists the fields present at this point, and Checkpoint run breaks the run down step by step with the source line and timing for each.
The bottom panel
| Tab | Shows |
|---|---|
| Results table | Rows produced by the selected checkpoint. Can be exported to CSV. |
| Profile tables | Summary statistics for the columns in that result. |
| Console | Output from the run as it happens. |
| Problems | Diagnostics from Validate, and any error that stopped a run. |
Rearranging the window
The sidebar, inspector and bottom panel can each be dragged to a new width or height, or collapsed entirely with ⌘B, ⌘⌥B and ⌘J. Sizes persist, so a layout you set up stays put between sessions.
Keyboard shortcuts
These come from the native menu, so they behave the way they do in any other application on your system. On Windows and Linux, use Ctrl wherever ⌘ is shown.
⌘⇧P is the one worth learning first — every action above is in the command palette, so you do not have to memorise the rest.
This is the short list. The keyboard shortcuts reference has every binding grouped by task, with a switcher for macOS, Windows and Linux.
Next, see how the checkpoint model works underneath the interface in Checkpoints, or start writing steps with the VeraScript reference.